A workflow action is defined by any specific action a user can take to update an entry. Actions, which display as buttons on your form, enable you to achieve a number of things within your workflow. An action can display a confirmation message, send an email notification, change the status of an entry, or clear a field.
A classic example of an action is the Submit button. The action of submitting a form can change an entry status from Incomplete to Submitted, display a message confirming the submission, and send an email notification to any individual within your workflow.
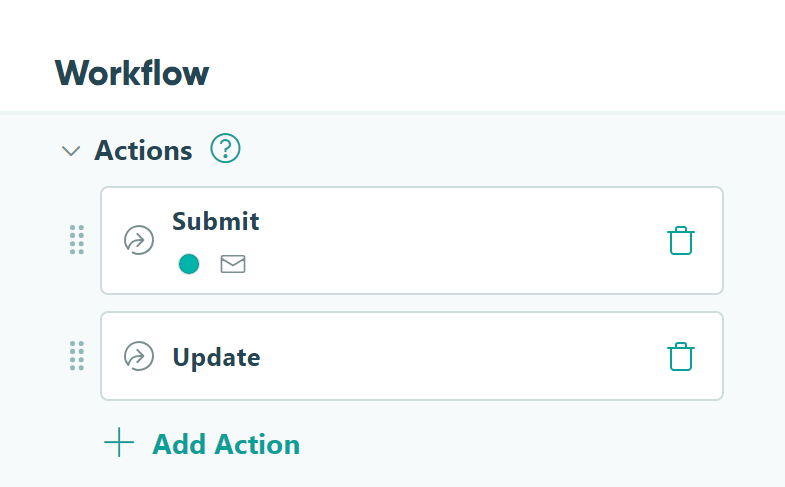
Creating actions
As you’re creating actions on your form, keep in mind that you’ll be viewing all available actions within your workflow while on the Build Page. These actions, however, can be conditionally available for specific roles and/or statuses within your workflow, and you’ll be able to access a role-based preview of your form within the Build Page as needed.
By default, your form will include a Submit action and an Update action.
Adding or editing actions
There is a maximum limit of 20 total actions within a single workflow.
To create a new action, click + Add Action under Actions within the Workflow menu. Alternatively, you can click the + button next to any existing action buttons at the bottom of your form.
To edit an existing action, click on the action within the Workflow menu to open Action Settings. Alternatively, you can click on the action button at the bottom of your form to edit an action.
Ordering, duplicating or deleting actions
The order of your actions in the form builder will be the order in which the actions are displayed on your form. Use the drag handles to the left of an action to click and drag actions into the preferred order for your workflow. You can also click on an action button at the bottom of your form and hit either Move Left or Move Right.
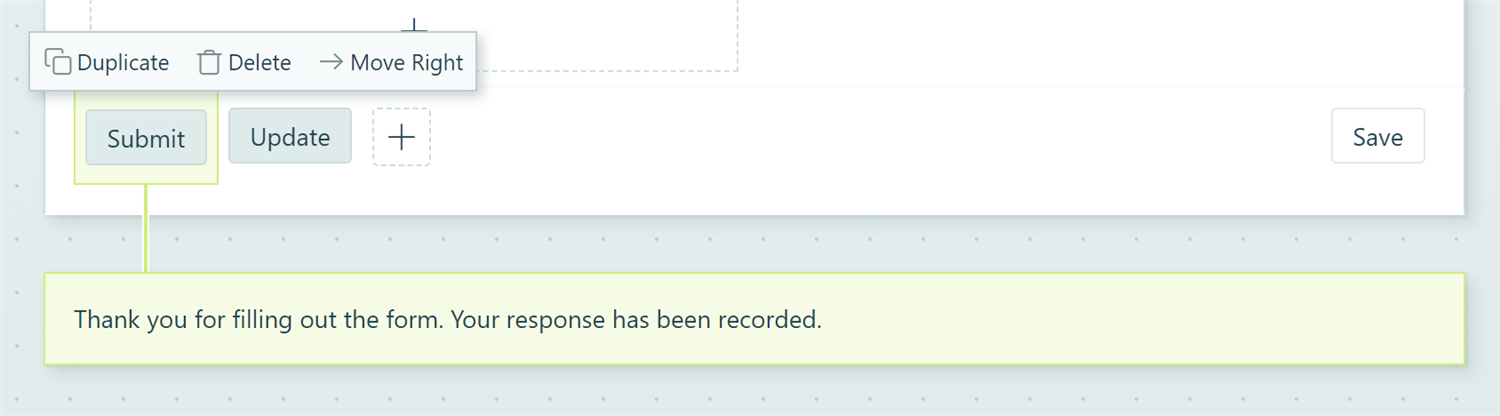
If you’d like to duplicate an existing action, click on the action button at the bottom of your form and hit Duplicate. Upon doing this, a new action will be created with the same Action Name followed by a number 1. All of the original Action Settings will be duplicated, including email notifications and related email settings.
To delete an action, click the trashcan icon next to the action name within Action Settings. You can also click the action button at the bottom of your form and hit Delete.
You’ll notice a Save button in the bottom righthand corner of your form if you’ve enabled Save & Resume on your form. The Save button cannot be deleted, reordered or renamed.
Action Settings
Action Settings can be accessed by clicking on the name of an action within the Workflow menu, or clicking on an action button at the bottom of your form.
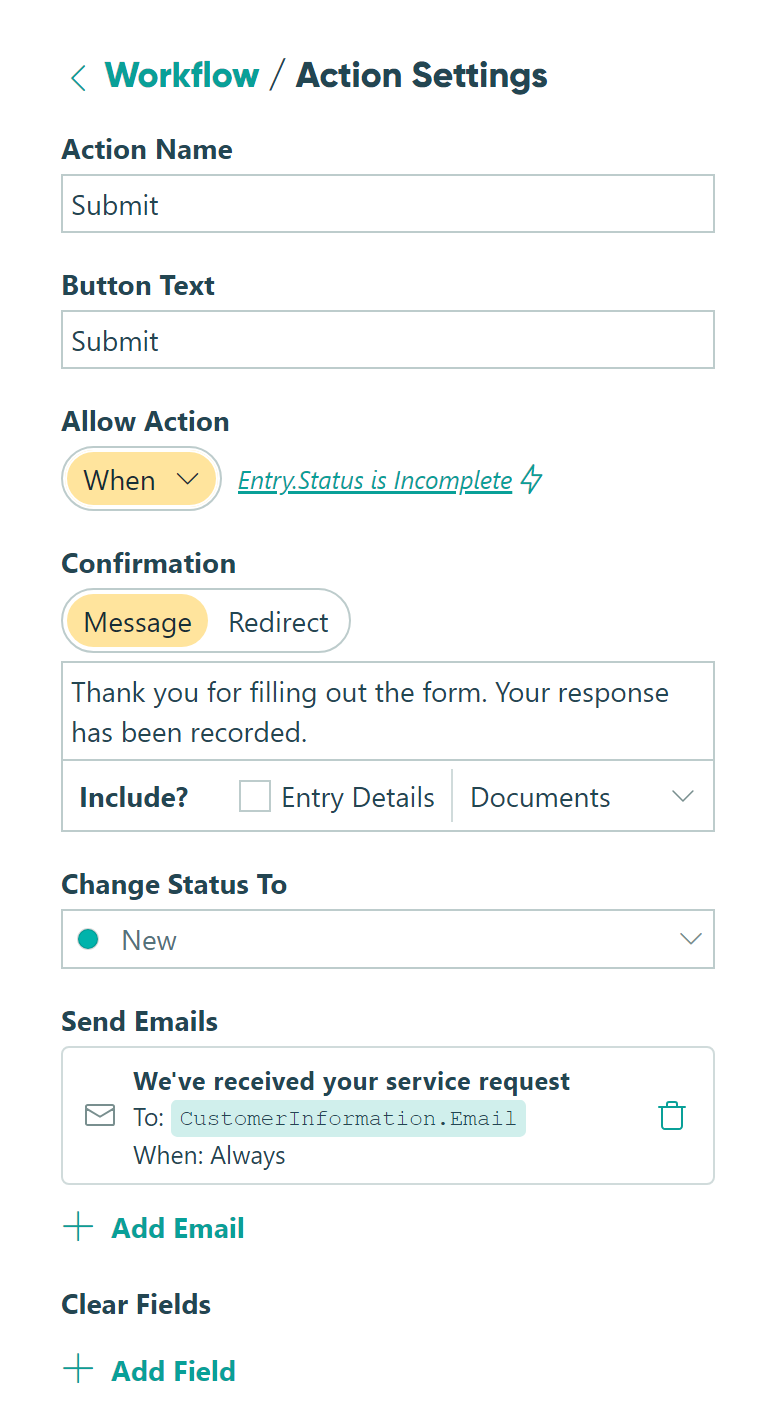
- Action Name - This field represents what you’ll call this action internally within your workflow. For example, you might want to name an action ‘Revision’ but have the Button Text show as ‘Submit’ for the form user. Action Names are limited to 40 characters.
- Button Text - The text that will show on your action button as the form user sees it.
- Allow Action - Choose when this action is allowed to take place within your workflow.
Always - This action is always available on your form.
When - Action will only be available when specific conditions are met. Select this option to open a conditional logic builder to select when the action should be available on your form.
For Roles - Specify which roles are allowed to perform this action.
Never - This action is never available on your form, and all buttons for this action will be removed. You can toggle on Never - either temporarily or permanently - to manually disable an action within your workflow.
- Confirmation - Choose between showing a confirmation message or redirecting the user to a specific URL upon the action being performed. Learn more about creating custom confirmation pages.
- Change Status To - Select which status to move your form to once the action has been performed. If you prefer no status change to take place, leave this field blank.
- Send Emails - Send an email notification when this action is performed by customizing email notifications for this action.
- Clear fields - Clear entry data for selected fields when this action is performed. Use this to reset fields for a workflow, such as when an approval entry is denied, or to clear out sensitive data such as a password. Please note clearing field values will permanently delete data.