Our new Workflow Automation feature makes it easy to build powerful, flexible workflows on a single form.
Our Entry Sharing feature isn’t just helpful for editing form entries after submission; it also provides an easy way to implement an advanced workflow with your forms. Using entry sharing and a bit of conditional logic, you can easily create forms with two stage submissions: in the first stage, the user submits a preliminary form. Then, after your staff approves the form, the user can come back to their entry via share link and enter additional information onto the same form.
How it works
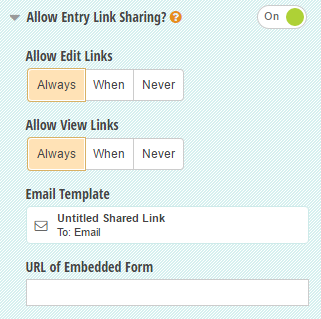
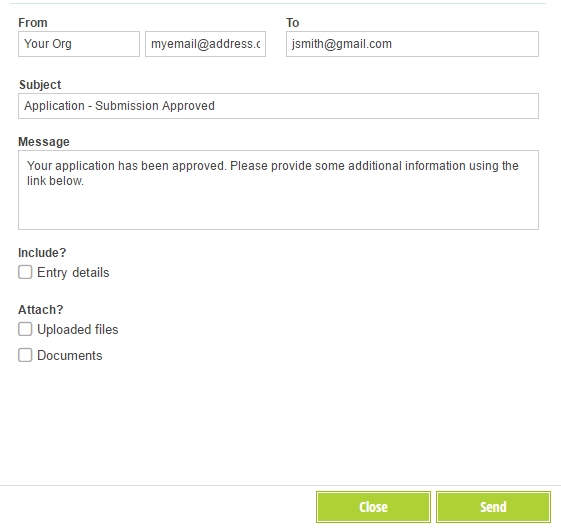
First, enable Entry Link Sharing under your Form Settings. Then, configure the email template - this is the notification containing the entry link that your users will receive after their submission is approved. If your form is embedded, make sure to include the URL of where the form is located on your website. This will ensure that users are taken back to your embedded form on your webpage when they edit their entries.
Add a Yes/No field to your form called First Stage Approved, set to only display Internally.

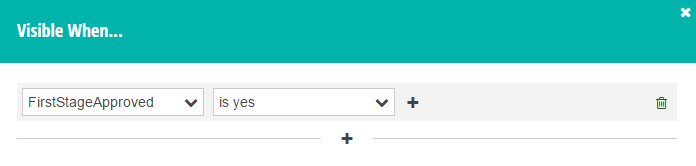
Add a section or additional fields that you want to appear after the first stage is approved. Then, select Show This Field - When for the section/fields and make them appear when the First Stage Approved field is Yes.
Following first stage submission, review the form from the Entries page, and set First Stage Approved to Yes if approved. Doing so will trigger the additional section/fields to appear on the entry.
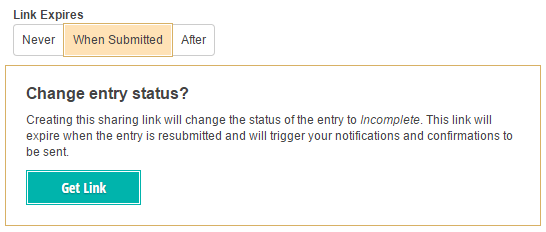
Select the Share option from the top of the individual entry, and set Link Expires to When Submitted to change the status back to Incomplete.
Send the email notification with the approval message. This email should be filled in and ready to go if you already configured your email template in the builder.
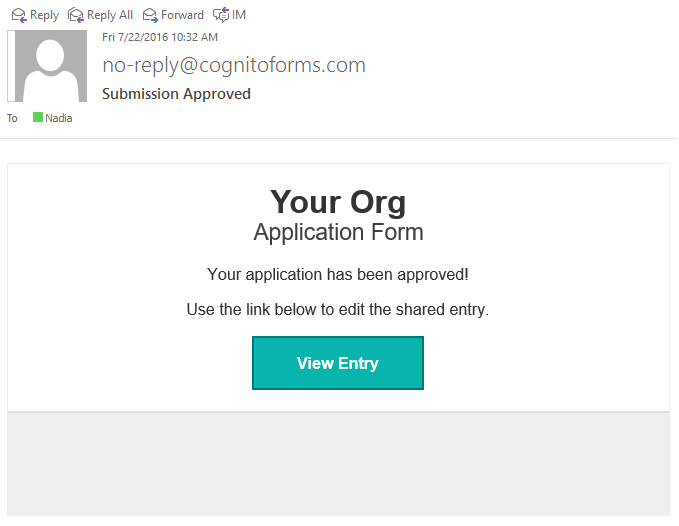
Your users will receive an email notifying them that their submission was approved, along with a link to edit their entry, which now contains additional fields:
Have any questions about entry link sharing, or Cognito Forms in general? Contact us today!

Nadia A.
Nadia, the Technical Writer for Cognito Forms, develops documentation, support content, and how-to videos. No matter your experience – with her help, you'll be able to take full advantage of the product. In her spare time, Nadia enjoys listening to French house, drinking coffee, and talking about herself in third person.