Whether it’s for placing an order, creating an account, or completing a survey, people fill out online forms almost every day. And depending on how well those forms are set up, trying to get through them might feel like a chore. However, there are several easy ways to make filling out your form a quick, easy, and intuitive experience.
1. Break up long forms with pages
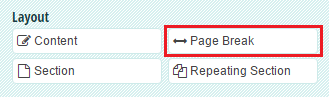
If anything is intimidating, it’s seeing a form full of empty fields that takes forever to scroll through. By separating the form into multiple pages and sections, it’s not only better organized in terms of information, but also keeps your users more engaged through every step of the process. To add a page break to your form, simply select the Page Break field from the Add Field box in your form builder, and place it where you want your new page to begin.
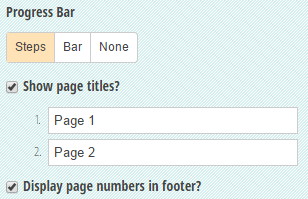
Additionally, when you click on the form title, you have the option to change the style of the progress bar, the name of each page, and whether to display page numbers in the footer.
2. Show fields only when necessary
In keeping with the spirit of not overwhelming the user, you can further streamline your form by showing and hiding certain fields depending on what the user answers. This makes the form feel much more responsive and individually catered to them, and doesn’t confuse them with extra options that they don’t need. Showing and hiding fields is easy with the help of some quick conditional logic.
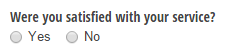
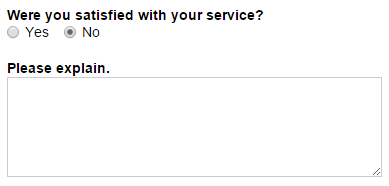
To start, create the field you want. In this example, we’re going to ask the user if they were satisfied with their service, and give them the option of choosing Yes or No.
If the user selects No, we want to have a separate field for them to explain why. After creating a Textbox field for this question, we’re going select “When” from the Show This Field section in the Field Settings box. In the conditional logic builder that pops up, set the field to only show when No is select in the previous question.
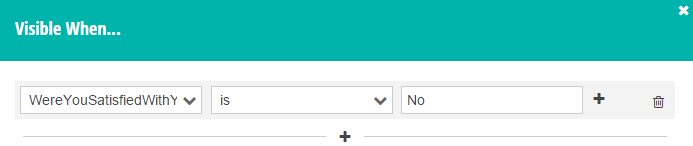
Now, when the user selects No, the second field will appear to ask them why.
You can also apply the same conditional logic to page breaks to hide and show entire pages.
3. Only collect the information you really need
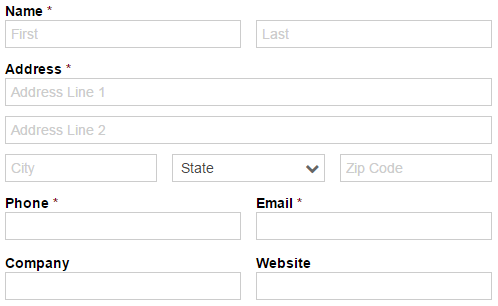
Another question you may want to consider: what information do you really need to collect on the form? It’s important to cut down on unnecessary questions and keep your form short, sweet, and to the point. If there are fields that you absolutely need to collect, you can set them as required in the field settings box.
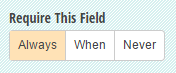
Let’s say you’re creating a contact form. Knowing a user’s website address and company name would be nice, but it’s not entirely necessary in order to contact them. Or, they may not even have a website at all. Setting certain fields as required will let your users know how much they really have to fill out, while ensuring that you still get all the information you need.
4. Give users options to choose from
Ideally, filling out your form should require as little effort from your users as possible. One way to achieve this is to make all of your user’s options clear and straightforward. If you’re making a volunteer signup, for instance, you’ll want to know which days of the week that a volunteer is willing to help, and for how many hours. Instead of using a Textbox field for the volunteer to type out every day that they are available, use a Choice field with the checkboxes type instead and let them simply check off their options. As for their available hours, create another Choice field with radio buttons and let the user select their time range.
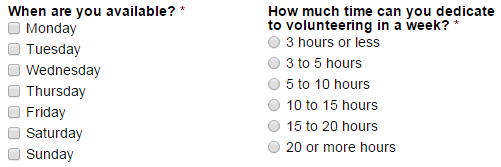
Not only does this create less work for the user, it also keeps all of the submitted form data consistent and easy to sort/filter.
5. Use clear language
How easy are your fields to understand? Instead of a longer and more verbose label, like this:

Consider something a little more simple:

If some of your fields require a bit more explanation to make sense, you can also use help text underneath for further clarification.
6. Choose the right type of input fields
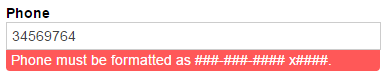
Using the right type of input field will ensure that you’ll receive the exact information that you’re looking for. Say, for example, you need to collect a phone number. There are several different fields types that could potentially collect a phone number, but only the Phone field will automatically format the number properly after a user types in it. It will also ensure that the number contains the correct amount of digits.
Or, if you’re collecting a number in the form of a percentage, only the percentage option for the Number field will instantly add a percentage sign and a decimal point.

7. Rename your submit button
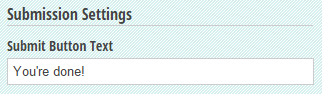
Last but not least, renaming your submit button is a small, but important final touch on your form. The label on your submit button should make sense with the rest of the content; for example, if you have a registration form of some kind, “Sign Up” might be more effective. Or, on a donation form, “Donate” might be an appropriate label. It’s a simple way of customizing your form that gives your users a better idea of what’s happening when they submit their entry. You can edit your submit button text at the top of the Submission Settings box in your form builder.
If you have any questions about any of these features, or just want general feedback on your forms, be sure to let us know!

Nadia A.
Nadia, the Technical Writer for Cognito Forms, develops documentation, support content, and how-to videos. No matter your experience – with her help, you'll be able to take full advantage of the product. In her spare time, Nadia enjoys listening to French house, drinking coffee, and talking about herself in third person.